


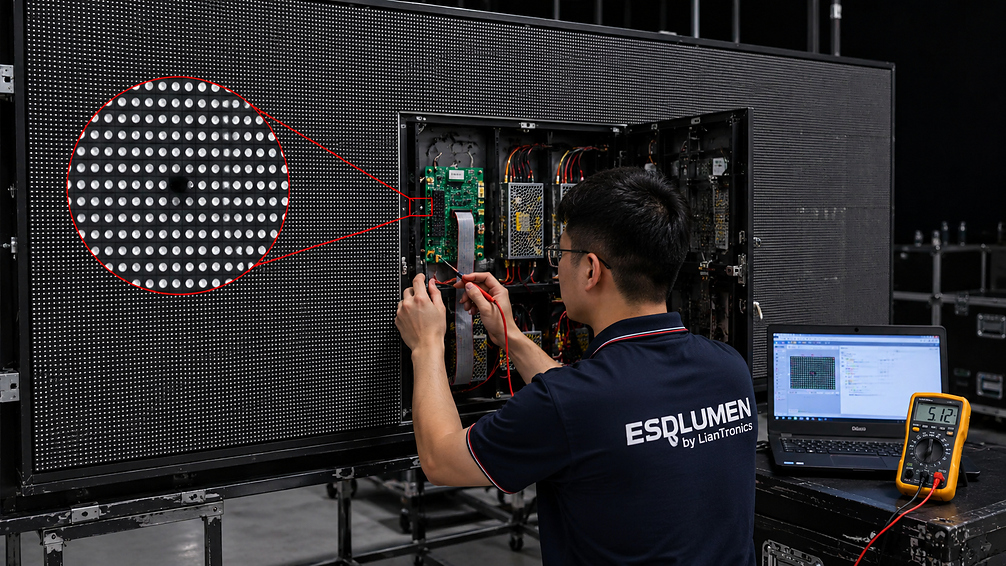
A black point on an LED screen does not always mean one failed LED lamp. On a commercial LED display, a dead pixel symptom can come from the LED itself, a weak solder joint, a loose ribbon cable, a HUB board contact issue, a receiving card fault, moisture damage, or unstable power.
That is why a good repair starts with diagnosis, not guesswork. Before replacing parts, confirm whether the point is truly dead or whether the screen is showing a fault from somewhere else. If you need the broader answer to whether a damaged display can be restored, see can an LED screen be repaired.
Start with the color test
Show full-screen black, white, red, green, and blue test patterns. If the same point stays black on every pattern, treat it as a true dead pixel. If it stays red, green, blue, or white, it is more likely a stuck pixel.
That distinction matters. A stuck pixel may recover after a restart or pixel-refresh test. A true dead pixel usually needs hardware repair, module replacement, or a deeper check of the signal and power path.
Avoid pressing or tapping the LED surface. Advice that sometimes works on consumer monitors does not belong on commercial LED modules. Physical pressure can damage lamp beads, masks, coatings, or nearby pixels and turn a small fault into a larger repair.
Swap the module before replacing parts
When one module shows abnormal pixels, the fastest field check is simple: swap the abnormal module with a known-good module.
If the fault moves with the module, the module is the problem. Replace the spare module or send the faulty module for repair. If the fault stays in the same cabinet position, stop blaming the LED lamp first. Check the HUB board interface, ribbon cable, bent pins, receiving card, and power path. This is the same logic used in Esdlumen's after-sales support troubleshooting flow.
Think of it like moving a flickering desk lamp to another outlet. If the lamp still flickers, the lamp is bad. If the flicker stays with the outlet, the wiring deserves attention.
What causes dead pixels on LED video walls?

Once the faulty area is confirmed, the next step is understanding what caused the dead pixel in that screen. Most failures fall into six practical groups.
LED lamp or chip failure. The pixel stays black because the LED can no longer emit light. This is especially easy to spot on fine-pitch screens where viewers stand close to the surface.
Weak solder joints. Solder fatigue behaves like a paperclip bent too many times. Repeated heating, cooling, transport vibration, or rental setup stress can crack the connection and interrupt current flow.
Moisture and corrosion. Humidity may not damage the display immediately, but it can slowly affect LED chips, driver ICs, solder joints, copper traces, and PCBA components. The visible result can be dead pixels, flicker, color shift, or dark clusters. That is why moisture control matters so much in long-term maintenance.
Electrostatic discharge damage. Electrostatic discharge can weaken LED chips or driver ICs before the defect becomes obvious. A pixel may pass early tests and then fail days or weeks later.
Heat stress. Running an indoor screen at maximum brightness all day increases heat load without improving visibility. Over time, high temperature accelerates LED aging and can contribute to solder fatigue.
Signal or power instability. Sometimes the LED itself is not the problem. Loose cables, poor HUB board contact, faulty driver ICs, receiving card issues, or power fluctuations can all create black spots, lines, color blocks, or repeating abnormal patterns.
A repair map technicians can use
Do not repair by habit. Repair by pattern.
| What you see | First place to check | Likely fix |
|---|---|---|
| One black dot on every color test | LED lamp, solder joint, or local module | Replace the lamp bead or module |
| Several bad dots in one module | Module circuit, moisture exposure, or solder fatigue | Swap the module and inspect local damage |
| Vertical or horizontal line | Ribbon cable, HUB board, or driver IC | Reseat the cable or replace the faulty board or component |
| Dark block or full module abnormality | Power path, receiving card, or module seating | Test the power supply, signal path, and module connection |
| Fault moves with the module | The module itself | Replace or repair the module |
| Fault stays in the same cabinet position | Cabinet-side path | Check the HUB board, ribbon cable, receiving card, and power path |
The symptom tells you where to look first. A single black point does not always mean the LED lamp is dead, and lines or blocks of abnormal color are almost never a one-pixel problem.

When module replacement is the better repair
For a high-visibility LED wall, the fastest fix is often module replacement, not lamp-by-lamp rework. A broadcast studio, control room, airport display, retail wall, or live-event screen cannot always wait for bench-level repair.
Front-maintenance design helps here. As explained in Esdlumen's front-maintenance guide, a faulty module can be removed from the front with the right tools, which saves rear clearance and shortens service time. Even so, high-density front-maintenance products still need proper ventilation and heat dissipation.
After replacement, run the color tests again and check brightness, grayscale, and color uniformity. A new module can be electrically correct but still visually mismatched, and that is still a failed repair from the viewer's perspective.
How Esdlumen reduces repeat pixel failure
Fixing the black spot does not always fix the root cause. If humidity, overheating, unstable signal, or poor module contact remain in the system, the same cabinet can fail again.
Esdlumen reduces repeat dead-pixel faults by combining module-level diagnosis, maintenance records, and moisture control. In particular, LED humidity protection matters because moisture can affect LED chips, driver ICs, solder joints, copper traces, and PCBA components long before the damage becomes obvious. Nano-coating and routine dehumidification help reduce that risk in suitable environments.
After repair, technicians should record cabinet location, module position, fault symptoms, and whether the problem moved with the module. That history makes it easier to tell whether recurring failures come from the module itself, the installation environment, or the signal and power path.
Prevent the next dead pixel
Once you understand what causes a dead pixel, prevention becomes much easier.
Keep brightness appropriate for the environment instead of running indoor screens at 100% all day. Leave ventilation space behind cabinets. Record each defect by cabinet, module, coordinate, date, and symptom. In humid spaces, use dehumidification, regular operation, nano-coating, GOB, conformal coating, or higher protection levels where appropriate.
Most importantly, do not use one repair method for every pixel fault. Stuck pixels and true dead pixels, module faults and HUB board faults, moisture-related clumps and loose-cable failures all need different handling.
The right repair is not the fastest part swap. It is the repair that fixes the cause, protects image quality, and keeps the LED screen stable when people are actually watching it.
Frequently asked questions
Can dead pixels on an LED screen be repaired?
Yes, but the right solution depends on the cause. If a pixel remains black on red, green, blue, white, and black test patterns, it is usually a true dead pixel and may require repair of the LED chip, module, driver IC, cable, HUB board, receiving card, or power path.
How can you tell the difference between a dead pixel and a stuck pixel?
Run a full-screen color test. A true dead pixel remains black on every pattern. A stuck pixel usually stays red, green, blue, or white. A stuck pixel may recover after a restart or refresh test, while a true dead pixel usually needs hardware repair.
What causes dead pixels on an LED display?
Common causes include LED chip failure, weak solder joints, moisture corrosion, electrostatic discharge damage, heat stress, unstable signal, and power issues. In some cases, the LED itself is fine and the fault comes from a loose cable, HUB board, receiving card, or power supply.
Why do technicians swap the LED module first?
Module swapping is a fast way to locate the fault. If the defect moves with the module, the module is likely faulty. If it stays in the same cabinet position, technicians should inspect the HUB board, ribbon cable, receiving card, and power path instead.
How do you prevent recurring dead pixels?
Use suitable brightness, maintain airflow, document each defect by cabinet and module location, and protect the display from moisture. Nano-coating, GOB, conformal coating, dehumidification, and regular operation all help reduce moisture-related pixel failures.


